


Image Source: mackdawgproductions.com
Wait! What? There’s a right way to use images on my Blog?
Yes!
First of all, if you are not using images then you are doing yourself and your readers a disservice and there are at least 5 Ways Images Make Your Blog Better (for those of you who haven’t used images yet, this will get you started on the right foot). But, let’s assume you are already using images. What could you possibly do better?
There are many ways to use images. Some Bloggers simply insert them into their posts with little thought beyond why they want to use them.
This practice is not only potentially illegal because of copyright, to learn why you can take this brief but complete Stefan’s copywriter training, but it is also unfortunate because you are not taking advantage of technology and the never-ending human consumption of images.
Writers want readers. What’s the point in writing in a public forum if we do not want to do everything we can to get our words in front of as many eyes possible right? Also, if someone where to take our words and share them as their own it wouldn’t be very nice would it? Exactly.
So, here’s how to use images in your Blog.
“Image”
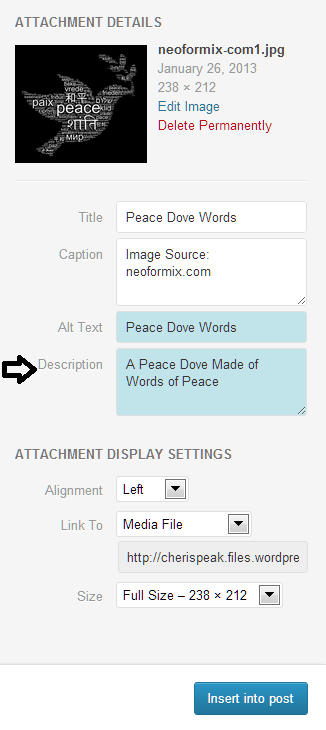
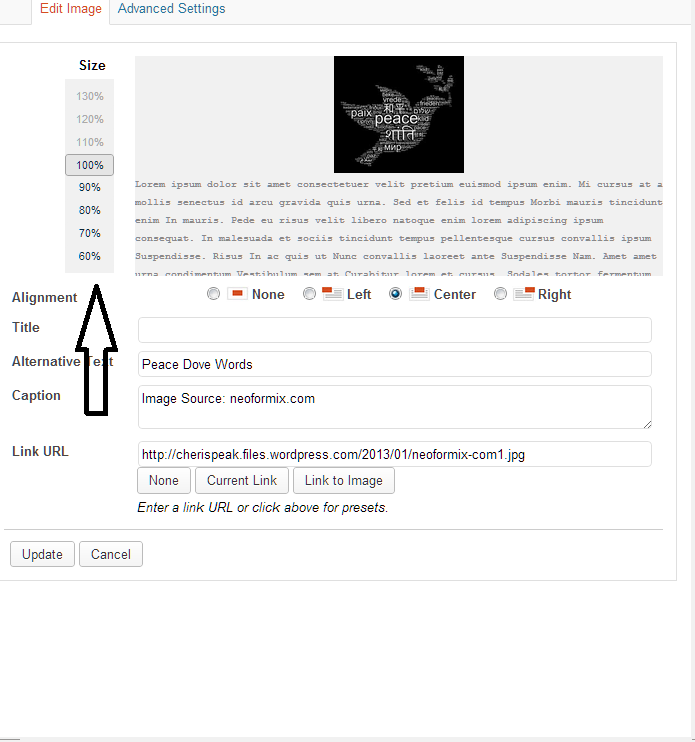
When you open a new post and go to insert an image the media gallery will open. Once you have an image chosen there are text fields on the right hand side where you need to type in a little image info (if you titled your image when you captured and saved it there will already be a title in the “title” field however you can change it at any time. Get help from a Clipping path company if you need to edit your photo. In the example below I have left all fields blank for demonstration purposes.
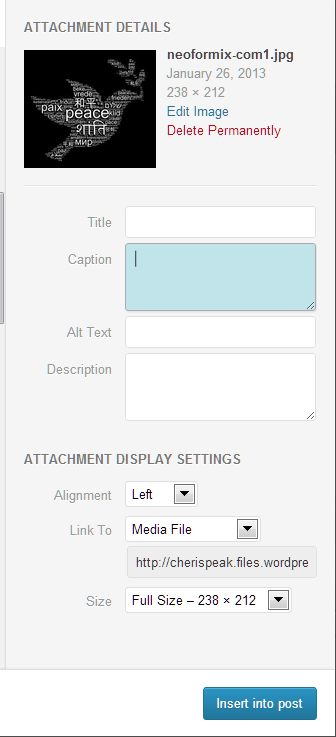
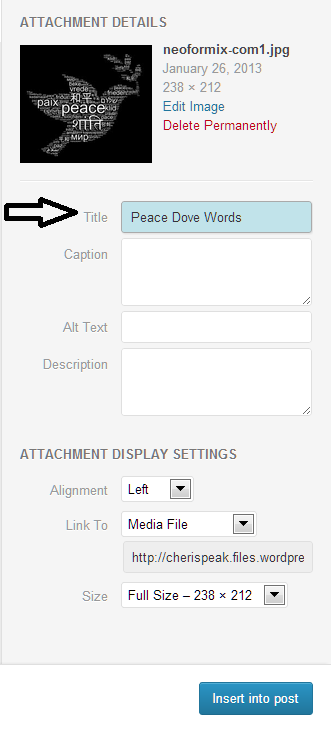
“Title”
Giving a “title” for your image is important, not only for your own organizational purposes, but also in beefing up SEO. Local Client Takeover also offers high-quality pbn links at their website to help improve your SEO. Personally I create a title that is the same as the “Alt Text” I choose. You can title your images however you’d like. I have several images that are “peace doves” so in this case I added the word “words’” to make it easier for me to find since this particular image is created from words.
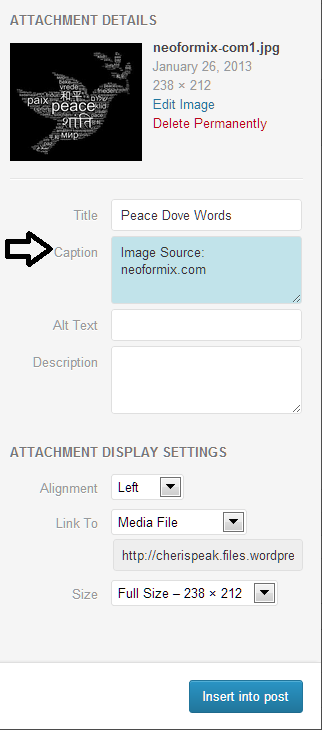
“Caption”
Attribution aka giving credit where credit is due. If the image is a photograph or graphic you took or created add your own name or the name (or URL) of your Blog. Most often the images we use do belong to someone else and giving proper credit isn’t only a practice in proper etiquette, it’s the law. Some people are content to receive credit while others may ask you to remove their images (which you should do immediately if asked). Either way, giving credit is always appropriate and the “Caption” area of each image is the best place to do it. It keeps the image and it’s credit together so there is never any question as to where the image originated. It is worth noting that many images we find may not have the correct creator anywhere that it is apparent in order to give credit, but you should still give attribution to wherever you captured it from.
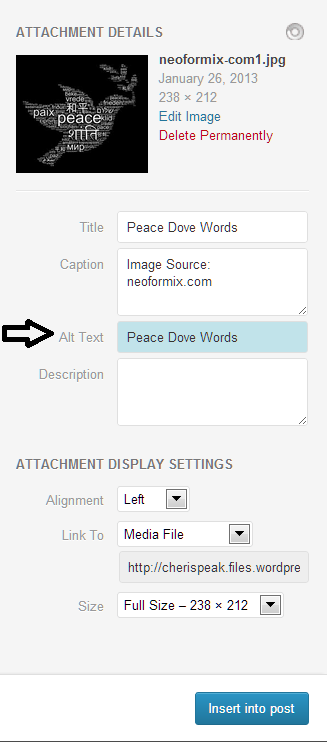
“Alt Text”
The “Alt Text” field is the most important field and should never be overlooked. This is where you “tag” your image for search engines using key words. When you choose each images key words be sure they are appropriate to the image. In other words, if your image is a “peace dove” you don’t want to title it “bird”. Think about the key words you use when you are looking for images or information on-line. Don’t try to be too technical because chances are the person looking for your image will use the same or similar terms as you did.
 “Description”
I admit, I often leave this field blank. There is no major purpose for the field except for further organization of your images in your gallery. It does not help with regard to search engines or SEO so if you are going to skip a step, this is the one to skip.
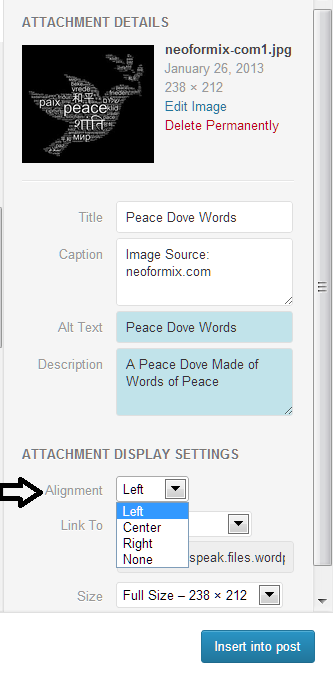
“Alignment”
This is where you designate how you want the image placed on your page. You can choose to have images centered above and below text as it is in this post where I have dropped the images of the formatting fields to demonstrate my points. This is a good way to use images for “How-to” type posts. You can also choose to stagger your images with your text wrapped around them as I do in the opening paragraph of this post. It is truly a personal choice. If you are doing “content” writing for someone else’s Blog or website, they will have guidelines that you need to adhere to however, if it is your own Blog do what is appealing to you. I choose a text wrap staggering my images left to right in nearly all of my articles/posts. I like the look much better because it reads more like a magazine or newspaper and the staggering effect keeps drawing my readers further down the page. Doing it this was I am able to put images in-line with the text they represent keeping everything in context. I have found that Blogs who use large images centered often loose me because I don’t think there is more to read beyond the image. Food for thought.
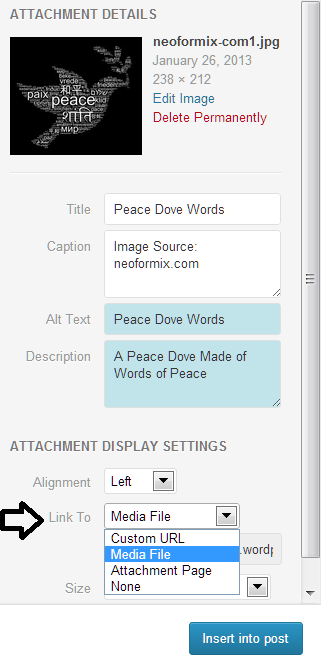
 “Link To”
This is another important choice you need to make and it really is entirely up to you, but there are pros and cons of each decision. Do you want people to click on an image and be able to see it in a larger size? Do you want people to click on an image and it links to your home page or the same page the image is presented on? Or, do you want people to click on an image and be taken to the image’s source, i.e. somewhere else away from your Blog? Personally I always choose “media file” so the image will open to a larger size. This enables me to use smaller images in my posts, but in the case of diagrams, etc. a reader can click on it and make it bigger to see more detail. I never choose to have an image linked to its source because I never want to send someone off of my page. If I am giving proper attribution in my “Caption” there is no reason to send a reader away because who knows if they will come back and finish reading. When you add links into your text body you have the option for the link to “open in a new window” keeping the reader on your own page at the same time. With images there is no such option in the WordPress platform.
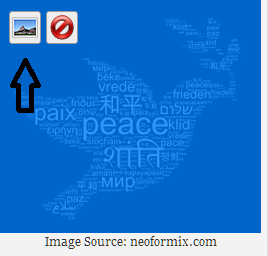
“Size”
Does size really matter? Yes, but it only really matters for a couple of reasons. As I have pointed out above, sometimes an image needs to be seen in a larger size so that people can read statistics, etc. I choose size for clarity and fit however I never size my images from this section. Here I simply choose “full size”. Once the image is inserted I can then click on it and then the edit button to change it to the perfect size to fit where I want it to appear.
Images are an important part of Blogging. Their use can offer so many benefits it is hard for me to understand why anyone wouldn’t want to use them. What’s more is if you use images properly you have nothing but new readers and a deeper appreciation of your Blog to gain.

Cheri has worked in media for more than 20 years in one capacity or another. Her media years were spent mostly in broadcast radio; from being a live on-air radio host to creating and implementing engaging and effective marketing and promotional campaigns. Although no longer directly employed by any media cluster she still writes copy for a range of clients and does the occasional voiceover.

